Are you seeing an error message similar to the picture below?
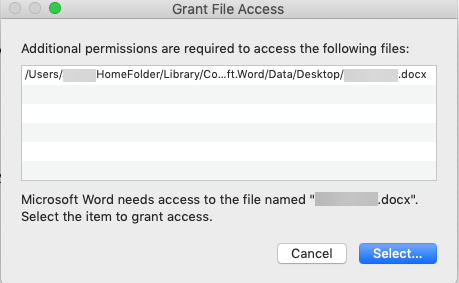
If so, then more than likely your computer is not setup to allow Office applications full access to your disk. Follow the steps below to enable this setting (or feel free to contact tech support at 515-965-7300 for assistance).
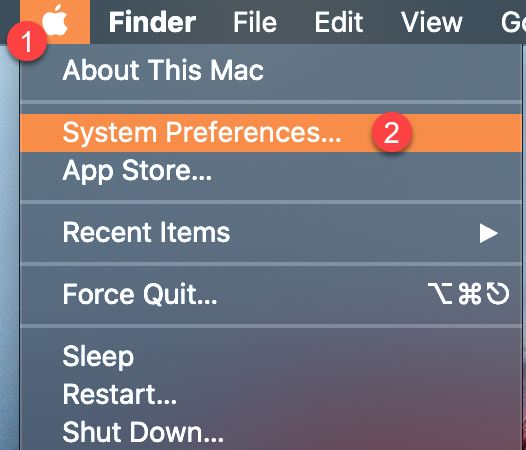
1.) Navigate to "System Preferences..."
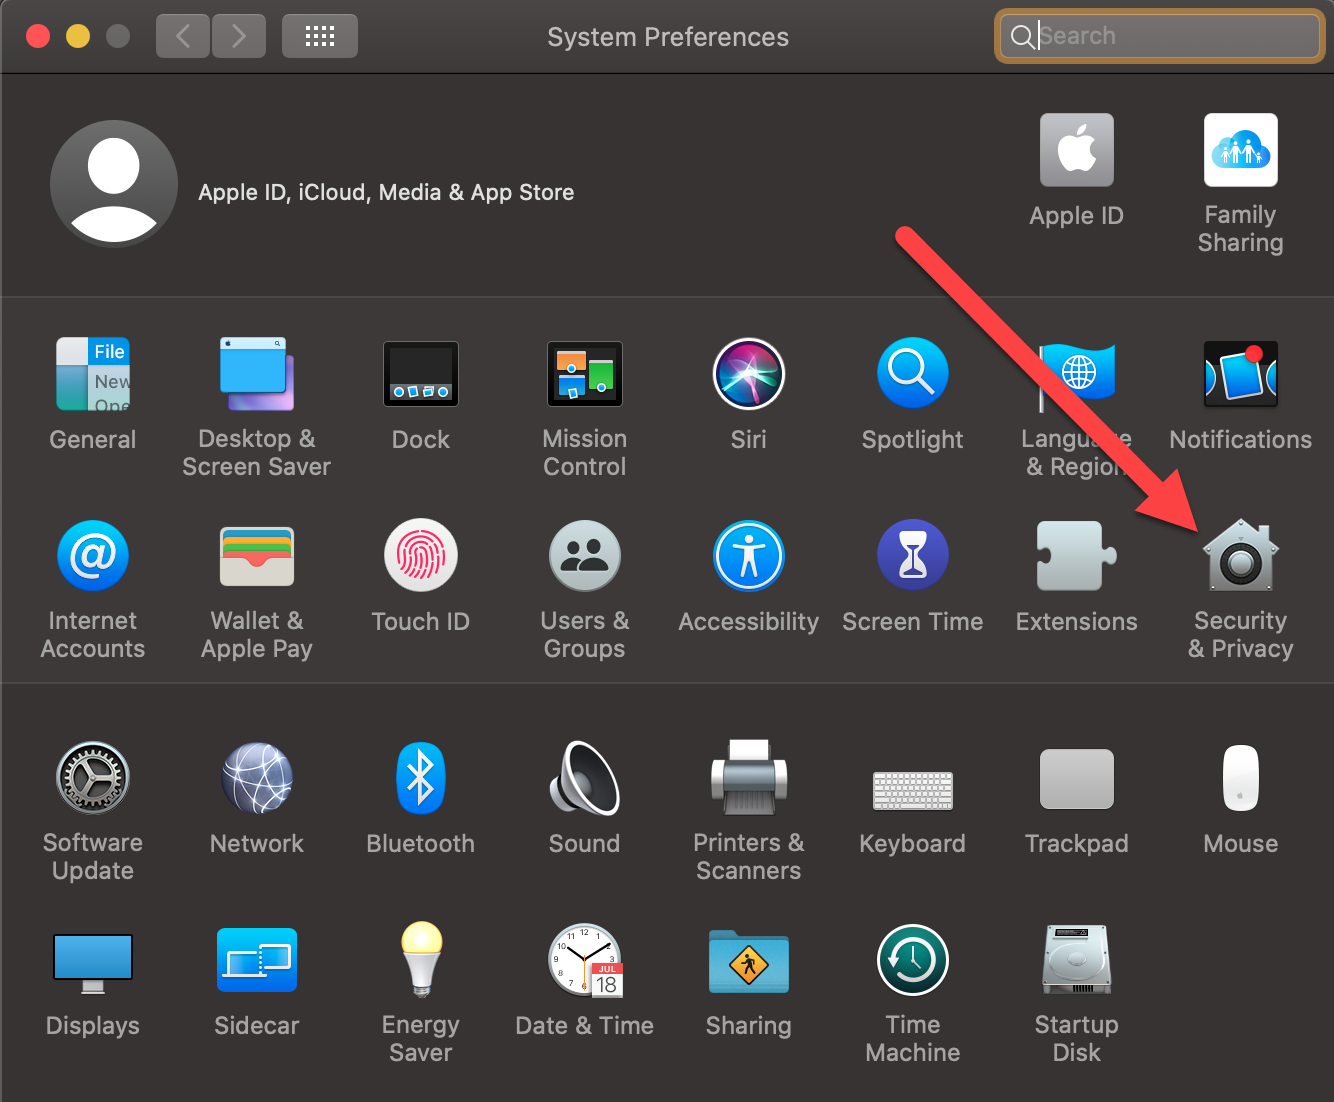
2.) Once you are in System Preferences, locate and select "Security & Privacy"
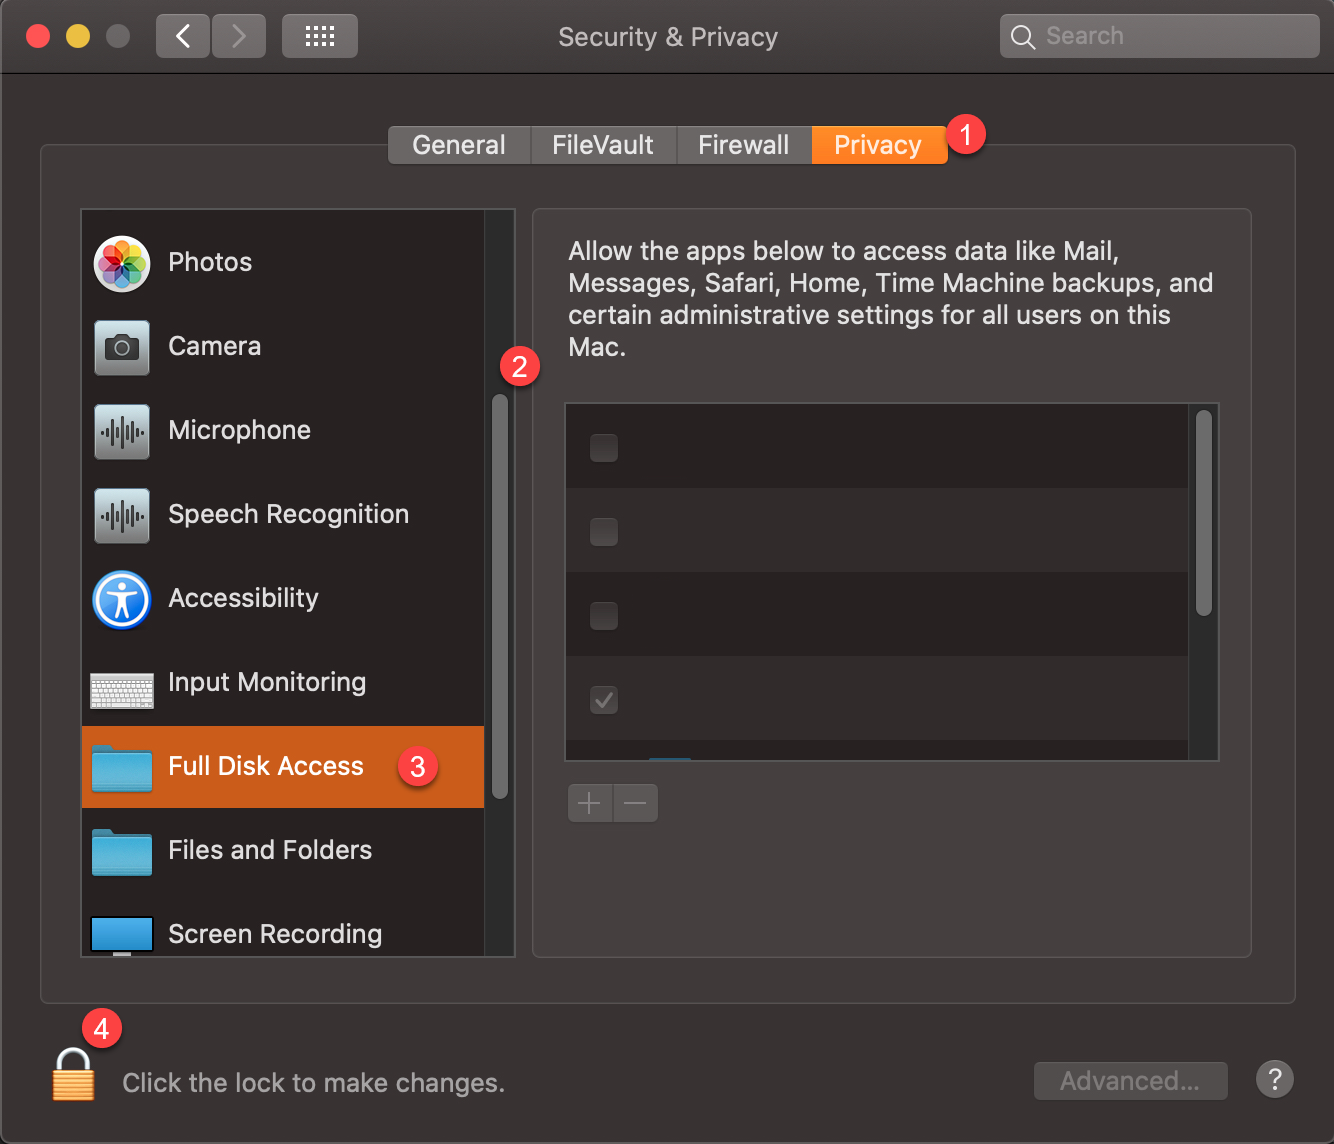
3.) Once you are in the Security & Privacy settings navigate to "Privacy" (1). Next, scroll down (2) until you find "Full Disk Access" (3). Once there, select the lock icon (4) to unlock the settings and make changes.
4.) Use Touch ID or choose to enter your password to unlock the settings.
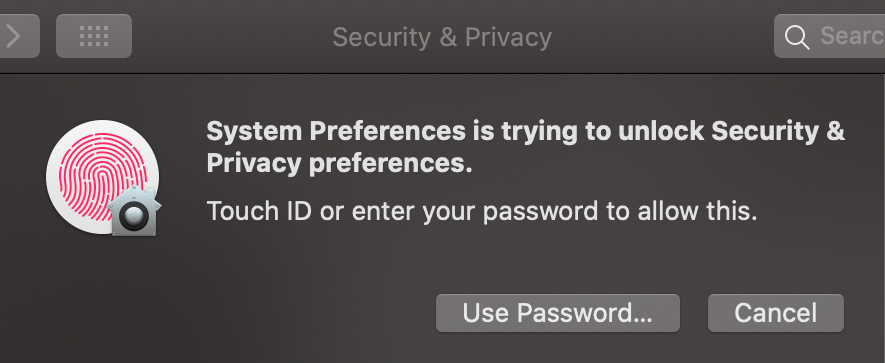
OR
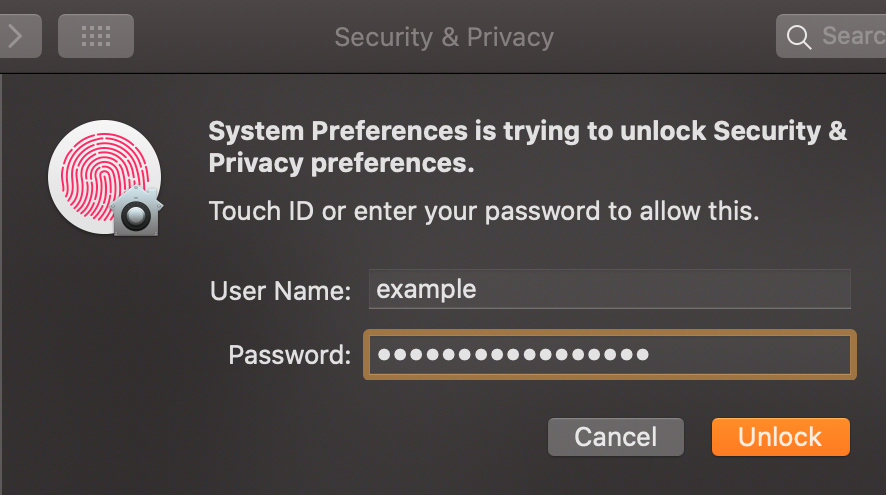
5.)Once the settings are unlocked your "+" and "-" icons will be active, no longer grayed out. Please select the "+" icon.
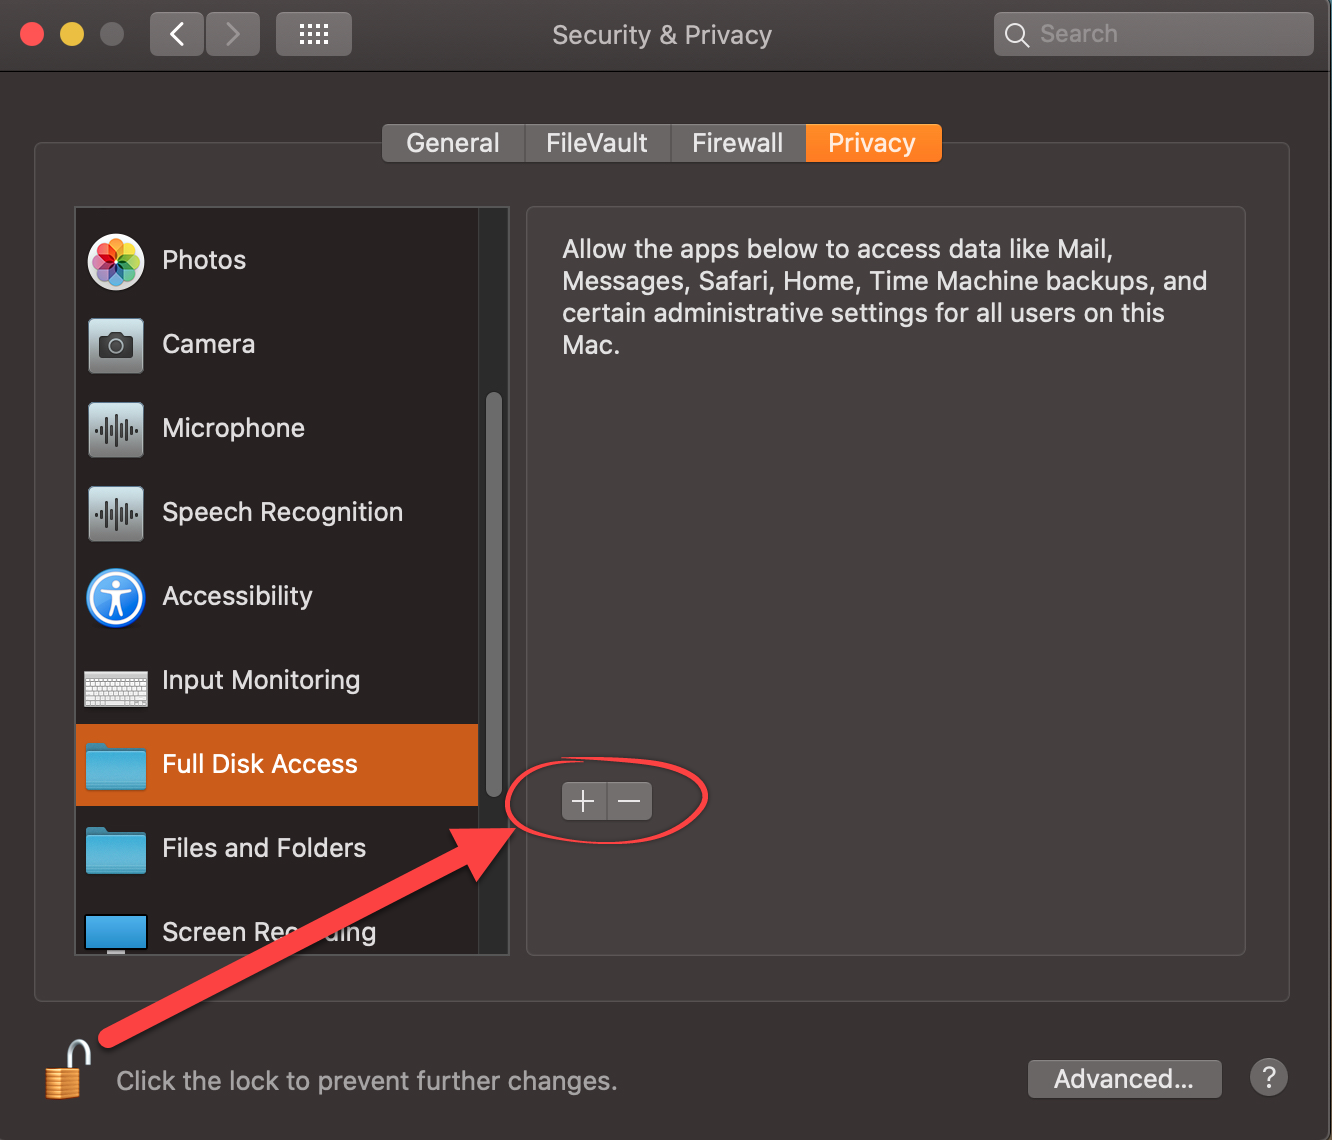
6.) Once you select the "+" icon a Finder window will open. This is where we need to navigate to the application we want to allow full disk access. In this case, Microsoft Word. The most common place to find applications is under the favorites menu in the Finder window.

7.) Once you are in your applications list, please find the application in question. In this case, Microsoft Word. Select "Microsoft Word" then select "Open".
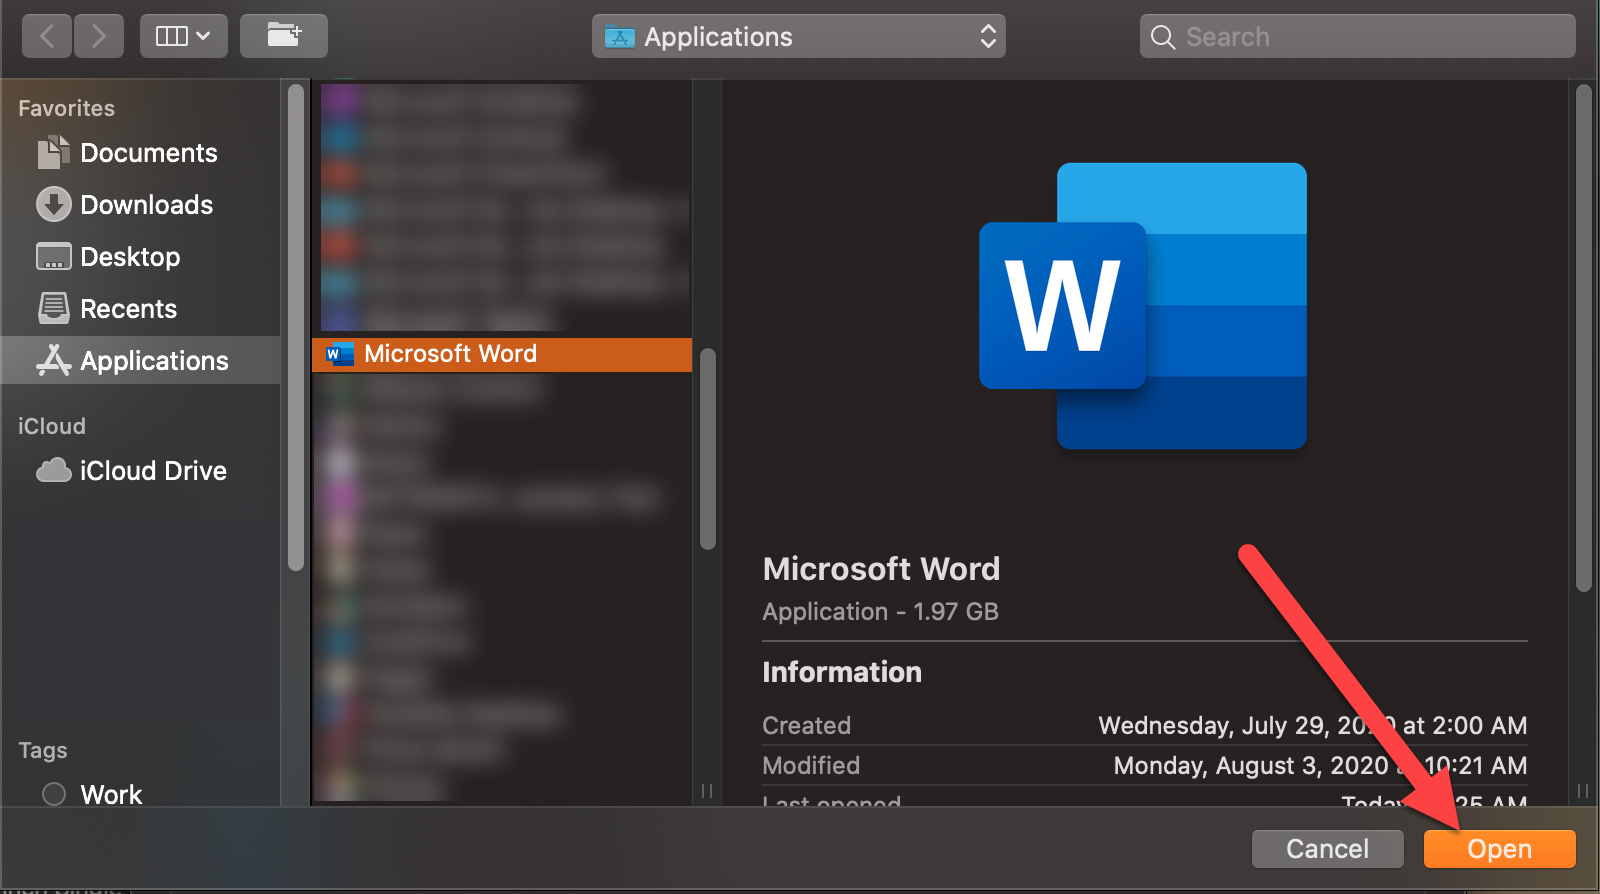
8.) Once it is open it will be added and check marked to your Full Disk Access list.
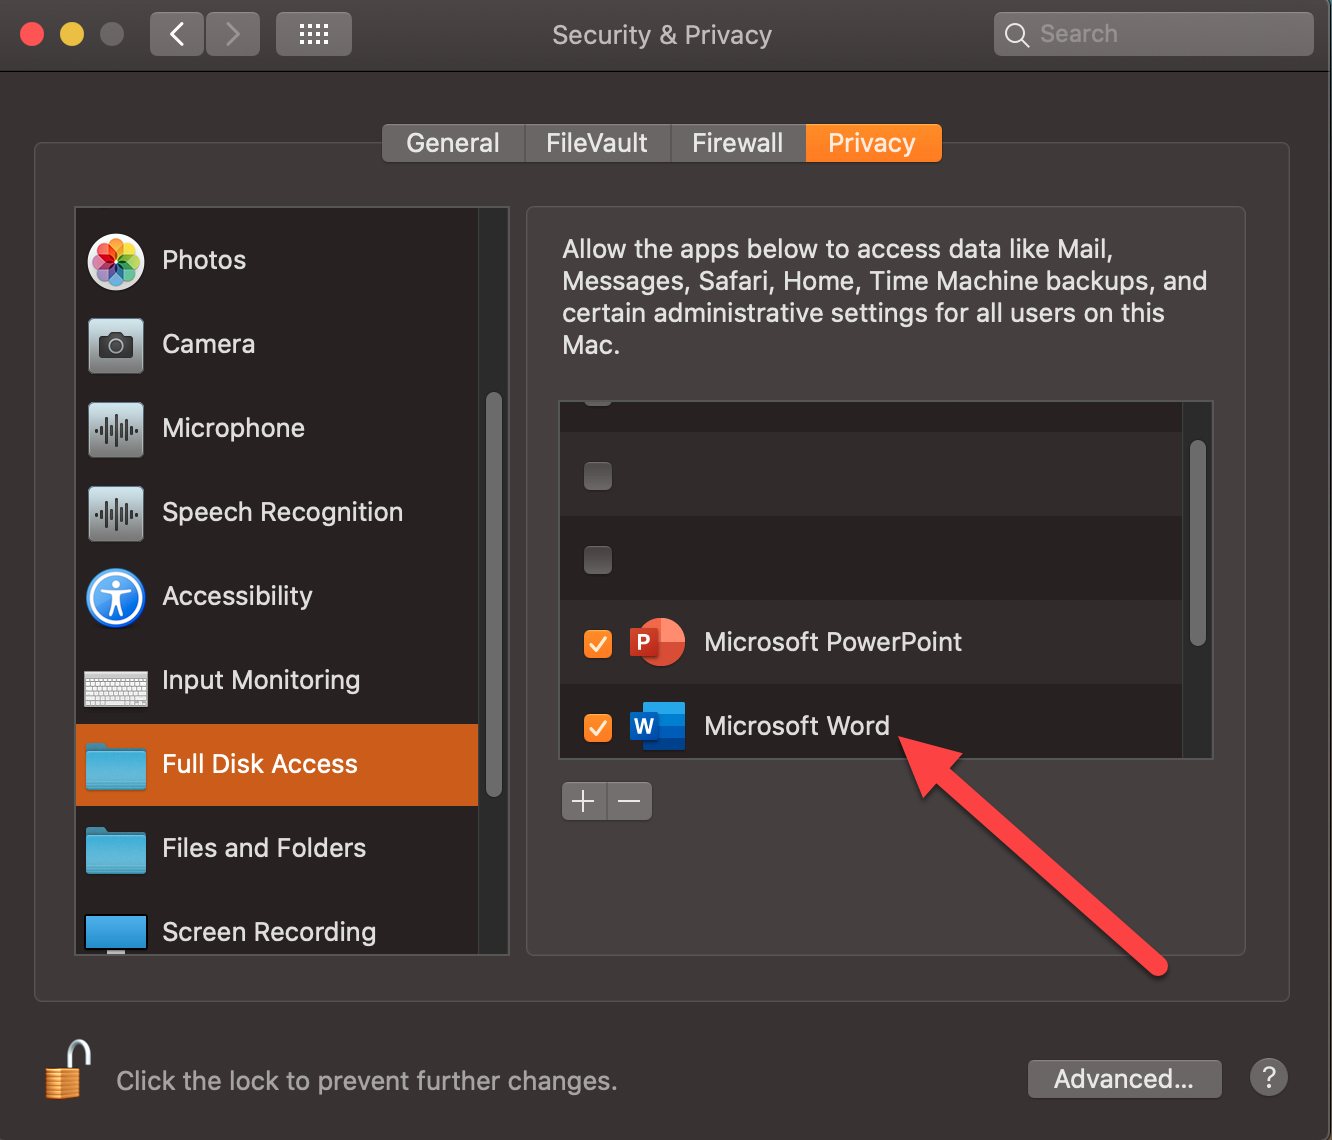
9.) If you need to add additional applications such as Microsoft PowerPoint repeat steps 5-8. Once you are finished adding applications to your list you can lock your settings to prevent any further changes.

If you have any additional questions or issues, please contact the Tech Support team to further troubleshoot.